Having an SSL certificate in your WordPress is the de-facto standard nowadays, did you know that? Google ranks sites having HTTPS higher in their SERP. But in WordPress, how do you configure an SSL certificate and HTTPS URL? You'll learn the important steps to move WordPress from http to https in this post.
The securities an SSL certificate provides
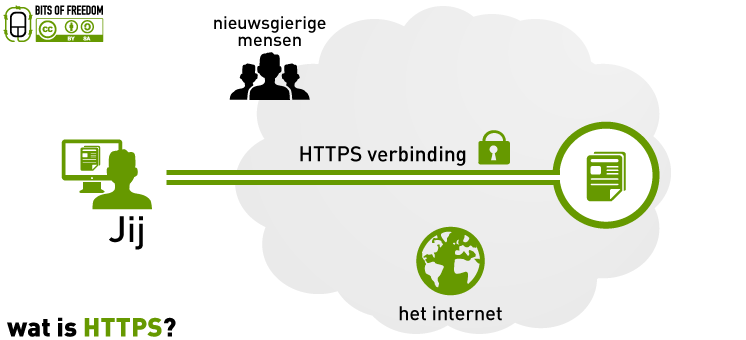
First of all: an SSL certificate, or in fact TLS certificates nowadays, basically provides more "securities" than just encryption. It does more than encrypting the traffic between the visitor and your website (traffic is encrypted and can't be intercepted and read by a third party).
One of the securities an SSL certificate provides is: trust. Because the client and server swap out and verify cryptographic certificates, you are guaranteed to only communicate with that particular server. Your privacy is protected because of the encryption and trust.
Here's a HTTPS diagram created by Bits of Freedom:
Above all, do note that an SSL certificate has nothing to do with "website security". It doesn't magically make your website more secure...
An SSL certificate for WordPress, and websites in general, is the de-facto standard nowadays.
Where we say SSL, or Secure Sockets Layer, we actually mean its successor TLS or Transport Layer Security. Please keep this in mind.
Move WordPress to HTTPS from HTTP, in baby steps
In the first place an SSL certificate is required for your optimized WordPress hosting. In the following sections I'll lead you through the steps of moving your WordPress website from http to https. Just keep on reading :-) .
Before you move your WordPress site to https, you need to ask yourself a couple of important questions. Really, it makes the migration job easier.
These questions are:
- Do I want my SSL website to be available with or without www. in the URL? Like https://example.com or https://www.example.com? This is important, not only for your website but also other online services that have your URL registered (Google Search Console, preferred domain, Facebook and/or Twitter API, and so on - more on that later). You have to notify all of them of your new URL.
- Do I use complete, absolute URL's in my blog posts and pages, or relative URL's? For example
<a href="http://www.example.com/blog/article-2">read more</a>versus<a href="/blog/article-2">read more</a>. When using absolute URL's, you have to update all of them. - The same as #2, but now for images and other types of content.
- All themes and plugins I use, can they cope with SSL URL's (HTTPS addresses), or do I need to make changes? See theme changes below for more information. If you really have to, switch themes.
After answering these simple questions, you know exactly what to do and when, and you can easily switch WordPress to SSL/https.
When your SSL certificate is installed in your site, enter your WordPress Dashboard, and go to Settings → General. Here you change the WordPress Address (URL) and Site Address (URL) to https://.

It's recommended to add the following to your wp-config.php file:
define( 'FORCE_SSL_ADMIN', true );This ensures your WordPress Dashboard is loaded over HTTPS, even when rewrites might not be correctly in place yet. The WordPress Codex page Administration Over SSL has more information about this.
Redirect non-SSL to SSL, and non-www to www (or the other way around)
The next phase in your WordPress HTTP to HTTPS migration is to redirect your visitors to this new URL. That's the whole point, right? :-) Preferably without your visitors having to do anything special. Let's make it extra easy for them.
Luckily, you can easily rewrite your URL's. By rewriting URL's, you make sure that - in the background - your visitors land on the https pages when they request a http URL. Quite handy!
In the following example, I make two assumptions:
- Always use HTTPS for your website, everywhere
- Your website lives on www.example.com (replace example.com with your own domain name)
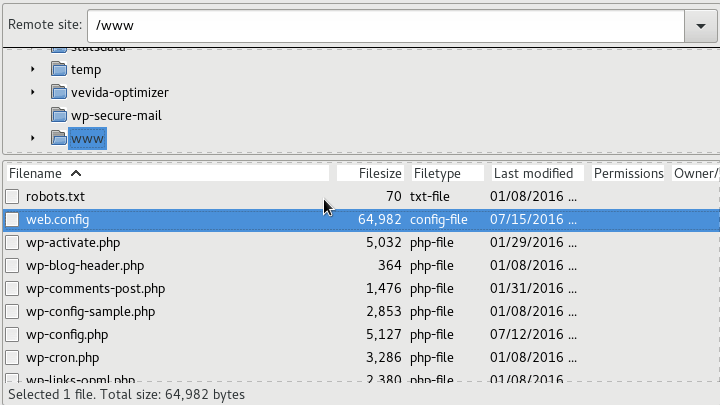
On different web server systems (Apache vs IIS) you'll need to use different rewrite methods. For Apache you have to edit a .htaccess file, and web.config on IIS.
Often you'll find these files in your webroot. Of course there are plugins you can use instead, I'll describe them as well later on in this article.
All provided web.config and .htaccess examples can also be found in other posts on this blog. Please use the web.config search option and .htaccess search option. They may provide you with more information.
Google Search Console: Don't forget to add all URL variants as sites in your Google Search Console! Add non-www HTTP (http://example.com), www HTTP (http://www.example.com), non-www HTTPS (https://example.com), and www HTTPS (https://www.example.com) URL's, or you'll loose search traffic otherwise!
Redirect best practices
Yes, there are best practices for redirecting resources. In particular for HTTP to HTTPS, the Mozilla Web Security Guidelines state:
Websites may continue to listen on port 80 (HTTP) so that users do not get connection errors when typing a URL into their address bar, as browsers currently connect via HTTP for their initial request. Sites that listen on port 80 should only redirect to the same resource on HTTPS. Once the redirection has occured, HSTS should ensure that all future attempts go to the site via HTTP are instead sent directly to the secure site. APIs or websites not intended for public consumption should disable the use of HTTP entirely.
The important part is: Sites that listen on port 80 should only redirect to the same resource on HTTPS.. And for you, this means you should implement the following redirect path (schematic):
http://example.com > 301 > https://example.com
https://example.com > 301 > https://www.example.com
http://www.example.com > 301 > https://www.example.com
Let me explain that for you:
- first, redirect http://example.com to https://example.com
- second redirect https://example.com to https://www.example.com
- and third, redirect http://www.example.com to https://www.example.com at once
This is not incorporated in the rewrites below.
URL Rewrite HTTP to HTTPS with web.config - Windows Server IIS
After you've installed WordPress and set up your Permalink structure, you should find the following rewrite rule in your web.config.
<rewrite>
  <rules>
    <rule name="WordPress: http://www.example.com" patternSyntax="Wildcard">
      <match url="*"/>
      <conditions>
        <add input="{REQUEST_FILENAME}" matchType="IsFile" negate="true"/>
        <add input="{REQUEST_FILENAME}" matchType="IsDirectory" negate="true"/>
      </conditions>
      <action type="Rewrite" url="index.php"/>
    </rule>
  </rules>
</rewrite>
It's the WordPress default. You can view this in my web.config for WordPress.
This one rewrite rule matches all incoming URL's through the * wildcard. The request is then send to WordPress' index.php file for internal handling.
On IIS, you have to add an additional rewrite rule in your web.config to redirect HTTP to HTTPS. This one has to be first (prior to this default Permalinks rewrite rule).
Open up an FTP connection to your website and - in FileZilla - choose View/Edit in the right mouse button context menu. This'll open the web.config file in your favorite (default) editor.
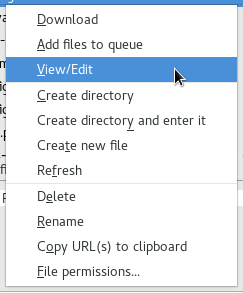
Save the file after making the changes below, FileZilla will automatically upload the file again. If you want some more information on this, Google translate my Dutch article "via FTP een bestand wijzigen met FileZilla".
Add the following rule between <rewrite> and <rule name="WordPress: ...">. Replace "example.com" with your own domain name:
<!-- redirect HTTP naar HTTPS -->
  <!-- see https://www.saotn.org/redirect-http-to-https-on-iis/
    for more information -->

  <rule name="example.com http to https" stopProcessing="true">
    <match url="(.*)" ignoreCase="true" />
    <conditions logicalGrouping="MatchAll">
      <add input="{HTTP_HOST}" pattern="^(www.)?example\.com$" />
      <add input="{HTTPS}" pattern="off" />
      <add input="{URL}" pattern="(.*)" />
    </conditions>
    <action type="Redirect" url="https://www.example.com/{R:1}" redirectType="Permanent" />
  </rule>
This may look complicated, but the logic behind it is quite easy. The three input lines are the conditions. When all three are met, an request is redirected. All three, because MatchAll means all input rules have to be matched.
The first two rules are the most important, I'll break them down for you:
- The incoming HTTP_HOST, is that www.example.com or example.com? The code
(www.)?means "www." is not mandatory in the HTTP_HOST, but is optional. This makes one rule for both www.example.com and example.com, neat! :-) - is HTTPS not already enabled?
- When these two conditions are met, redirect the request to https://www.example.com/, using a 301 Permanent redirect. The Request-URI, or URL part, is what's saved in the third condition, and is glued to the redirect URL in
{R:1}.
Rewrite HTTP to HTTPS with .htaccess - Apache
The following .htaccess rewrites also work on Windows Server IIS, if you have a .htaccess processing module like Helicon Ape available.
As with a web.config file, an .htaccess holds a default set of rules for WordPress Permalinks. They are:
# BEGIN WordPress
<IfModule mod_rewrite.c>
RewriteEngine On
RewriteBase /
RewriteRule ^index\.php$ - [L]
RewriteCond %{REQUEST_FILENAME} !-f
RewriteCond %{REQUEST_FILENAME} !-d
RewriteRule . /index.php [L]
</IfModule>
# END WordPress
To set up a http to https redirect in .htaccess, add the following directly below RewriteEngine On:
# redirect HTTP naar HTTPS
RewriteCond %{HTTPS} Off [NC]
RewriteCond %{HTTP_HOST} (www\.)?(example\.com) [NC]
RewriteRule (.*) https://www.%2/$1 [L,R=301]
Or a bit shorter:
# redirect HTTP naar HTTPS
RewriteCond %{HTTPS} Off [NC]
RewriteRule (.*) https://%{HTTP_HOST}/$1 [L,R=301]
These rewrite conditions and rule do the same as the web.config equivalent: redirect http://www.example.com and http://example.com to https://www.example.com, while maintaining the requested URL.
Follow the same FTP method as with the web.config file for downloading, editing and uploading the .htaccess file to your website.
If you are on an NGINX web server, you can add the following to redirect from HTTP to HTTPS:
# Redirect HTTP to HTTPS in Nginx
server {
  listen 80;
  server_name example.com www.example.com;
  return 301 https://example.com$request_uri;
}
WordPress plugins for HTTP to HTTPS redirection
Some great plugins to use when switching to HTTPS/SSL, for WordPress, are:

Easy HTTPS Redirection is a plugin that allows an automatic redirection to the "HTTPS" version/URL of the site. The plugin WP Force SSL provides that same functionality.

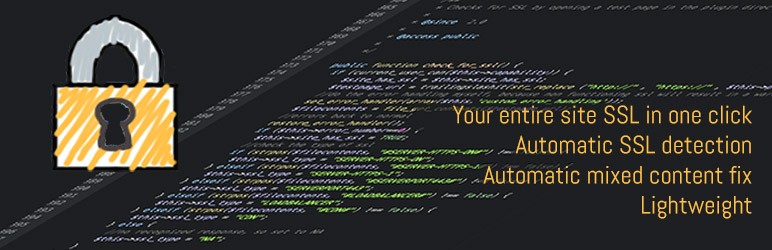
The Really Simple SSL plugin automatically detects your settings and configures your website. To keep it lightweight, the options are kept to a minimum. The entire site will move to SSL.
What to do after the 301 redirect?
Now your 301 redirect from http to https is in place and tested, start changing and moving your domain and URL at remote services like Google Search Console, Analytics, and all others. They all need to be aware of this new HTTPS address. Don't forget other online services where you have API access, such as Twitter, Facebook, different sharing services, etc.
Tips for using HTTPS, mixed content warnings, resolving issues, and best practices
In the first moments after setting up an SSL certificate for your website and configuring WordPress to make use of it, you must think of a lot of things. Mixed content for example, but also about some important server headers to set.
You, or your website visitors, may get mixed content warnings if you still load content over an unencrypted http connection from within your encrypted HTTPS connection. For example an image or other asset or resource. In order to provide your visitors with the best user experience possible, you must resolve these mixed content warnings.
And here's how, split up into different sections.
Theme code changes to resolve mixed content warnings
Always use a child theme to make code changes!
Sometimes a theme uses its own Options Framework to set URL's, instead of looking at earlier mentioned WordPress site_url. If your theme uses its own Options Framework, change URL's there as well.
You can often find an Options Framework in the top admin bar, or in your Dashboard menu on the left:
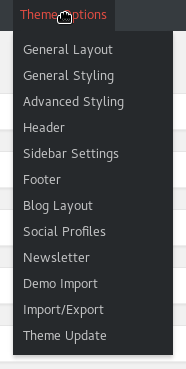
Furthermore some poorly written themes may load JavaScript and/or fonts from an unsecure, or non-HTTP, URL. For example from googleapis.com for jQuery or a pretty looking font.
You can recognize such a poorly written theme because there's only a http-address in the wp_register_script() function:
wp_register_script( 'jquery',
	'http://ajax.googleapis.com/ajax/libs/jquery/2.1.4/jquery.min.js',
	false, '2.1.4', true );
This loads jQuery only from a http address, causing mixed content warnings. Therefore you need to rewrite to use a https address:
wp_register_script( 'jquery',
	'https://ajax.googleapis.com/ajax/libs/jquery/2.1.4/jquery.min.js',
	false, '2.1.4', true );
Or there has to be some logic to determine the loaded and used protocol:
$prefix  = is_ssl() ? "https" : "http";
wp_register_script( 'jquery',
	$prefix.'://ajax.googleapis.com/ajax/libs/jquery/2.1.4/jquery.min.js',
	false, '2.1.4', true );
Best practice: To always use HTTPS is best.
Your website visitors get mixed content warnings if you still load content over an unencrypted HTTP connection from within your encrypted HTTPS connection.
How to fix mixed content warnings with a WordPress filter
Below is a WordPress function to automatically replace all occurrences of your old HTTP URL to its HTTPS equivalent. You might find this to come in handy, especially if you have a lot of internal links pointing to the unsecure HTTP address. Most likely internal links or images for example.
This is a very easy way to prevent mixed content in your blog posts.
Add this small filter to replace http with https everywhere in your blog posts content. Open up your theme functions.php or site-specific plugin, and add the WordPress filter code:
<?php
function saotn_replace_content( $content ) {

 /**
 * be as precise as possible, WordPress filter to change http to https
 */
  $content = str_replace( 'http://www.saotn.org', 'https://www.saotn.org', $content );
  return $content;
}
add_filter( 'the_content', 'saotn_replace_content' );
Your blog posts are available through the_content, and all this filter does is replacing http://www.saotn.org with https://www.saotn.org. To not to change links to external websites by accident, you have to be as precise as possible.
Best practice: such a replace function causes some extra overhead in PHP - minor increase in CPU and RAM usage. Therefore it's best practice to use such a function temporarily. Until you've had the time to fix all internal links and URL's manually.
Two plugins you can use to replace all occurrences of HTTP with HTTPS are Better Search Replace and Velvet Blues Update URLs:

Better Search Replace
When moving your WordPress site to a new domain or server, you will likely run into a need to run a search/replace on the database for everything to work correctly. Fortunately, there are several plugins available for this task, however, all have a different approach to a few key features. This plugin consolidates the best features from these plugins.
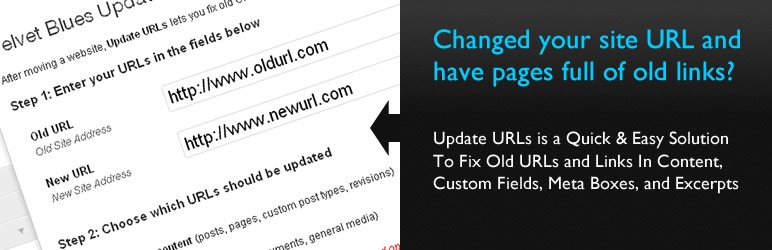
Velvet Blues Update URLs
If you move your WordPress website to a new domain name, you will find that internal links to pages and references to images are not updated. Instead, these links and references will point to your old domain name. This plugin fixes that problem by helping you change old urls and links in your website.
But of course, you can use a MySQL REPLACE() function on your database tables as well. I have a MySQL REPLACE example in my post String Replace on all WordPress Posts in MySQL. As always, be careful with this!
HTTP Strict-Transport-Security (HSTS) response header
The HTTP Strict-Transport-Security (HSTS) response header is an security measurement that protects SSL secured websites from downgrade attacks. An HSTS header is important, but do read the OWASP HSTS Cheat Sheet to get more acquainted with it.
You can set it easily in your web.config or .htaccess file.
I can imagine you may not want to mess with your server configuration files. Therefore you can also set this header through WordPress, in your functions.php theme file. My post How to enable HTTP Strict-Transport-Security (HSTS) on IIS shows you the PHP code until it get's its own blog post here.
The earlier mentioned HSTS Cheat Sheet provides information on max-age, includeSubDomains and preload.
SSL in WordPress, the conclusion
To sum up, in this article, I've provided you with a lot of SSL and HTTPS information. I hope it wasn't too much or difficult, and I do love to receive your feedback.
Because an SSL certificate, or HTTPS address for your website, is the de-facto standard now, and Google ranks sites with HTTPS higher, it's important to have a basic understanding of what SSL/TLS is, how to set it up and why.
I hope this article helped you to understand what SSL is, setting it up and redirecting WordPress from http to https. And, in fact, as a result you are now protecting your visitor's privacy!
Have questions? Please don't hesitate to ask them in the comments!

Thank you very much! <3 ❤️

Hi, my name is Jan. I am not a hacker, coder, developer or guru. I am merely an application manager / systems administrator, doing my daily thing at Embrace – The Human Cloud. In the past I worked at CLDIN (CLouDINfra) and Vevida. With over 20 years of experience, my specialties include Windows Server, IIS, Linux (CentOS, Debian), security, PHP, websites & optimization. I blog at https://www.saotn.org.

Hello Great Article, question, I recently migrated my site to SSL and my load times went crazy very slow I was under 2 seconds now is above 10! :( I ve been reading diferent things on the web about this issue, My hosting service tech support say that problem is that I used the plugin Simple SSL that that plugin is generating extra redirects that I should have done it manually instead of using pluggins, you think thats a true statement?
Hi Juan, thank you for your comment!
I find it strange that your load times went from 2 to 10+ seconds. A redirect plugin like Simple SSL can be the cause of that, but I can’t tell for sure. My advice is to first try to use manual rewrites (.htaccess, or web.config for IIS) to see if that makes a difference.
Further, make sure everything loads correctly. Use those webmaster help programs in Chrome (F12, or CTRL+SHIFT+I).
Goodluck!
Great article. Any hints on dealing with cookies when sitting behind an AWS Load Balancer (which redirects 443 to 80 on the web server)?
Hi @gustavestresenreuter, thank you for your comment. Glad you liked it :)
As for the cookies, if you’re behind a load balancer, and the connection between LB and back-end server is not encrypted, then I wouldn’t try to set the Secure flag. Can’t you configure an SSL certificate on your web server? Then you can connect 443 ELB to 443 HTTPS from your instance (for example http://www.emind.co/how-to/how-to-force-https-behind-aws-elb/ )
This was the same conclusion I drew. The SSL covers the apex domain and all subdomains so it has to be on the load balancer, but there is nothing stoping the load balancer from loading a self-signed cert for it’s connection to the web server. Looking into keeping traffic on 443 just to keep things simple. Thanks for confirming my suspicions!
Great post!