Since Win32-OpenSSH version 8.9.1.0p1-Beta there is decent support for FIDO/U2F hardware authenticators. This means we can use a YubiKey with Windows 11 and Windows 10, w00h00! In this post, I’ll show you how to install Microsoft OpenSSH client in Windows 11 and Windows 10, and how to configure your YubiKey. If you follow this guide and all goes well, you no longer need additional tools like Git Bash, openssh-sk-winhello or MremoteNG / MobaXterm.
In this article, I’ll walk you through setting up Microsoft OpenSSH for authentication with Yubico YubiKey FIDO2 security keys. Using passwordless authentication is often considered more secure than using password authentication because they use a second factor of authentication. If you follow these steps you can use your YubiKey in Windows 11.
For my environment, I’ll be using a Yubico YubiKey 5C NFC with only touch/tap. See How to configure SSH with YubiKey Security Keys U2F Authentication on Ubuntu and/or Securing OpenSSH keys with hardware-based authentication (FIDO2) if you want to learn more about One Time Pads (OTP).
Install Microsoft OpenSSH Client in Windows 11
Installing OpenSSH Client is pretty straightforward, but there are some caveats you need to be aware of. For example, earlier installed versions of OpenSSH.
This is about installing OpenSSH client (ssh.exe), if you are wondering how to install OpenSSH Server (sshd.exe) in Windows, see Install OpenSSH in Windows Server.
First make sure no earlier versions of OpenSSH are installed on your system, for example when you used Dism, Add-WindowsCapability or installed OpenSSH manually. If a version is installed, remove it first or it’ll conflict.
Secondly, download the OpenSSH-Win64-v8.9.1.0.msi Windows Installer file from https://github.com/PowerShell/Win32-OpenSSH/releases. Note you must have at least version V8.9.1.0p1-Beta. You can install this .msi file in two ways:
- double clicking the Windows Installer file from within Windows Explorer
msiexecfrom the (cmd / PowerShell) command line
The latter has our preference, additional steps are required if you install ssh by double clicking the installer file. If you have installed by double clicking, see Configure Path Environment section for more steps.
The OpenSSH .msi Windows Installer file can install both ssh Server and Client (the default), and only Server or only Client. We want that last one, and the command line option is ADDLOCAL=Client. By default, msiexec.exe doesn’t add the installation path to your system’s $env:path environment variable. For this, add ADD_PATH=1 to the command.
This makes the full command to install OpenSSH Client on your system:
Start-Process `
  -NoNewWindow msiexec.exe `
  -ArgumentList "/i <full_path_to>\OpenSSH-Win64-v8.9.1.0.msi ADDLOCAL=Client ADD_PATH=1" `
  -Wait
OpenSSH is a perfect tool for your Windows 11 and WSL 2 DevOps environment.
Configure Path Environment for OpenSSH
This is only required if you have double clicked the installation .msi file.
If you don’t want to type out the full path to the ssh.exe executable file (C:\Program Files\OpenSSH\ssh.exe) constantly, add the directory to your System or User PATH environment variable. On multi-user systems, modifying the System PATH environment is recommended.
Update System PATH environment using PowerShell
As Administrator:
[Environment]::SetEnvironmentVariable( `
  "Path", [Environment]::GetEnvironmentVariable( `
    "Path",[System.EnvironmentVariableTarget]::Machine `
  ) + ';' + ${Env:ProgramFiles} + '\OpenSSH', `
  [System.EnvironmentVariableTarget]::Machine `
)
Edit User PATH environment
As an user you can execute:
[Environment]::SetEnvironmentVariable( `
  "Path", [Environment]::GetEnvironmentVariable( `
    "Path",[System.EnvironmentVariableTarget]::User `
  ) + ';' + ${Env:ProgramFiles} + '\OpenSSH', `
  [System.EnvironmentVariableTarget]::User `
)
As you can see, these are complicated commands and therefor it’s best/easier to just install using msiexec.exe.
Reboot
You must reboot or logout/login in order to have the new path environment variable available. I prefer to simply reboot. Continue with creating a key pair after rebooting and logging back in.
Remove OpenSSH using DISM – Bonus
If an older version of OpenSSH is installed, you can use DISM (Deployment Image Servicing and Management) or its Remove-WindowsCapability cmdlet, to remove OpenSSH Client.
Use one of the following commands:
dism.exe /online /Remove-Capability /CapabilityName:OpenSSH.Client~~~~0.0.1.0Remove-WindowsCapability -Online -Name OpenSSH.Client~~~~0.0.1.0About Remove-WindowsCapability:
Uninstalls a Windows capability package from an image.
Replace “Client” with “Server” to remove a previous installed OpenSSH Server:
dism.exe /online /Remove-Capability /CapabilityName:OpenSSH.Server~~~~0.0.1.0Remove-WindowsCapability -Online -Name OpenSSH.Server~~~~0.0.1.0After successful removal you can directly start with a new installation.
Generate an OpenSSH Security Key (SK) key pair
Now it’s (finally) time to generate your Security Key (sk) key pairs. Of course you have more than one YubiKey, so you always have a back-up.
Here’s how:
- Enter one YubiKey into your USB-C drive. You’ll notice the ‘Y’ logo to light up and start flickering for a second.
- Execute the following command in PowerShell (or cmd.exe), replacing the placeholders ‘username’ and ‘yubikeynumber’ with their respective values. For convenience, I name my keys containing the YubiKey number and creation date.
ssh-keygen.exe -t ecdsa-sk -C "username-$((Get-Date).ToString('MM-dd-yyyy'))-yubikeynumber" -f .ssh/id_ecdsa_sk-yubikeynumberFollow the on-screen instructions and touch your YubiKey when requested.
- Switch YubiKey and execute this step again.
- Done
You’re all done.
Ssh config file tweaks
Some tweaks to the stock ssh configuration file are required to ease sessions and authentication. Create or open up the .ssh\config file in notepad.exe:
notepad.exe "${env:USERPROFILE}\.ssh\config"Create the following section for your host:
Host bastionhost.example.com
HostbasedKeyTypes sk-ecdsa-sha2-nistp256@openssh.com,sk-ssh-ed25519@openssh.com
# Instead of HostbaseKeyTypes directive, you can also point to
# ssh identity files:
# IdentityFile c:/users/username/.ssh/id_ecdsa_sk-012345678
# IdentityFile c:/users/username/.ssh/id_ecdsa_sk-012345679
Compression yes
User username
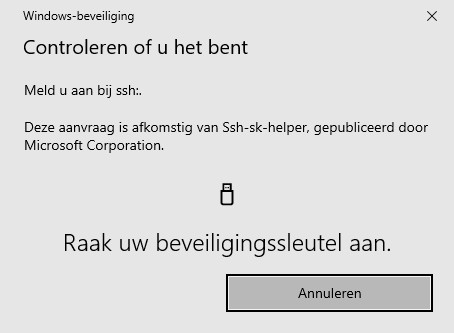
ForwardAgent yesNow when you type bastionhost.example.com into your PowerShell command-prompt, WinHello automatically opens a pop-up and asks you to touch your YubiKey.

Did you like this post?
Please take a second to support Sysadmins of the North and donate!
Your generosity helps pay for the ongoing costs associated with running this website like coffee, hosting services, library mirrors, domain renewals, time for article research, and coffee, just to name a few.
Conclusion
In this post you learned how to install Microsoft OpenSSH Client properly in Windows 11 and Windows 10 to support FIDO/U2F security keys like a YubiKey.
Microsoft Win32-OpenSSH finally supports FIDO / U2F devices such as a YubiKey! 🙂 This means you no longer have to rely on Git Bash alone (which is a great product btw), or Reza Tavakoli OpenSSH helper openssh-sk-winhello. Now you can have one tool, with one ssh version instead of two or sometimes even three.
Later I’ll add instructions to this post how to share OpenSSH keys with WSL2, create a dedicated WSL OpenSSH config and how to use that specific WSL 2 OpenSSH config file for git usage. Making your Windows 11 workstation a fully fledged development station (DevOps)!
In Windows Server you can also store SSH keys in Active Directory; key-based authentication in OpenSSH for Windows.
[…] your $env:path environment variable. There are some other caveats. You can follow my guide “install Microsoft OpenSSH Client properly in Windows 11 and Windows 10 to support FIDO/U2F security …” on Windows Server 2022 / 2019 to install and configure OpenSSH Server and Client using .msi […]
[…] you have the OpenSSH client installed in Windows 11/10, then you can use a command similar to Linux’ ssh […]
[…] Win32-OpenSSH (Win32 port of OpenSSH) Client for use with my Yubico YubiKey, as described in “YubiKey support in OpenSSH for Windows 11“. Before Win32-OpenSSH version 8.9.1.0p1-Beta I had to rely on Git Bash, which is a great tool, […]