
Yesterday, I showed you how to block IP addresses in Windows Firewall using PowerShell. This comes in handy when blocking IP addresses that are brute-force attacking your servers. In this post I’ll show you how to bulk add IP addresses in Windows Firewall, list an IP address and how to remove all IP addresses from Windows Defender Firewall with Advanced Security. Using PowerShell ofcourse.
But the GUI is also discussed, no worries 🙂
This post explains how to bulk add IP addresses in Windows Firewall, list an IP address and how to remove all IP addresses from Windows Defender Firewall with Advanced Security. Keep Windows (Server) secure.
For this post, I assume you have the same firewall data available as in my previous post Block brute force attacks on SQL Server, block IP addresses in Windows Firewall using PowerShell. Read that article first if you’re unsure. Let’s assume you have not yet created your firewall rule “IP Block SQL Server”, but you have your unique_ips.txt input file ready.
The PowerShell cmdlets I’ll be using are:
- Get-NetFirewallRule
- New-NetFirewallRule
- Get-NetFirewallAddressFilter
- Set-NetFirewallRule
- Remove-NetFirewallRule
Looking to block an IP address in Windows? Quickly jump to the Windows Defender command-prompt netsh commands to add, list and delete IP addresses in the Windows Defender firewall. Or follow the article for PowerShell cmdlet usage.
If you follow this article to block IP addresses in the Windows firewall and make a small mistake, you could ruin your own internet connection! Be careful, and of course, I accept no responsibility.
Add IP addresses to Windows Firewall in bulk
The Set-NetFirewallRule and New-NetFirewallAddressFilter cmdlets both accept an array as an input for the RemoteAddress attribute. And that’s great, because now you can add a lot of IP’s in bulk to your firewall:
# How to Bulk Add IP Addresses in Windows Firewall:
$ips = @()
foreach ($ip in Get-Content .\unique_ips.txt) {
  # Check for the existense of the firewall rule
  if(!(Get-NetFirewallRule -DisplayName "IP Block SQL Server" -ErrorAction SilentlyContinue)) {
    # if the rule does not exist, create it silently and keep it disabled
    New-NetFirewallRule -DisplayName "IP Block SQL Server" -Direction Inbound -Action Block -Enabled False
  }
  # compare IP addresses in the firewall rule (if any) with those in ann PowerShell array $ip
  if ((Get-NetFirewallRule -DisplayName "IP Block SQL Server" | Get-NetFirewallAddressFilter).RemoteAddress -eq $ip) {
    # debug:
    # Write-Host "IP ${ip} already blocked"
    continue
  }
  else {
    # IP address not found in the firewall rule, add it to the array
    $ips += $ip
  }
}

# Add IP addresses from the array to your firewall rule
Set-NetFirewallRule -DisplayName "IP Block SQL Server" -Direction Inbound -Action Block -RemoteAddress $ips

# Does the firewall rule contain one IP address or more?
if((Get-NetFirewallRule -DisplayName "IP Block SQL Server" | Get-NetFirewallAddressFilter).RemoteAddress.count -ge 1) {
  # debug:
  # Write-Host "Found more than one IP address, enable the rule"
  if((Get-NetFirewallRule -DisplayName "IP Block SQL Server").Enabled -eq "False") {
    # debug:
    # Write-Host "Firewall rule is disabled, enable it now"
    Set-NetFirewallRule -DisplayName "IP Block SQL Server" -Enabled True
  }
}
Add one (1) IP address in Windows Firewall
Here is how you can add one (1) IP address to block in Windows Firewall. This involves having to add that one IP address to an array of currently blocked IP’s.
$ip = "233.252.0.12"
$all_ips = (Get-NetFirewallRule -DisplayName "IP Block SQL Server" | Get-NetFirewallAddressFilter).RemoteAddress
$all_ips += $ip
Set-NetFirewallRule -DisplayName "IP Block SQL Server" -Direction Inbound -Action Block -RemoteAddress $all_ips
Look up an IP address in the Windows Firewall
Looking up an IP address in your firewall – using PowerShell – is quite easy:
# Lookup an IP address:
$ip = "233.252.0.12"
if((Get-NetFirewallRule -DisplayName "IP Block SQL Server" | Get-NetFirewallAddressFilter).RemoteAddress -eq $ip) {
  write-host "${ip} is blocked"
}
You may even use an array of IP addresses to look up in Windows Firewall with Advanced Security:
$ips = @("233.252.0.12","233.252.0.15")
foreach($ip in $ips) {
  if((Get-NetFirewallRule -DisplayName "IP Block SQL Server" | Get-NetFirewallAddressFilter).RemoteAddress -eq $ip) {
    write-host "${ip} is blocked"
  }
}
List active firewall rules
Use the following to neatly display active firewall rules. Adjust to your needs.
Get-NetFirewallRule -Enabled True -Direction Inbound |
Format-Table -Property DisplayName,Action,
@{Name='Protocol';Expression={($PSItem | Get-NetFirewallPortFilter).Protocol}},
@{Name='LocalPort';Expression={($PSItem | Get-NetFirewallPortFilter).LocalPort}},
@{Name='RemotePort';Expression={($PSItem | Get-NetFirewallPortFilter).RemotePort}},
@{Name='RemoteAddress';Expression={($PSItem | Get-NetFirewallAddressFilter).RemoteAddress}},Profile,Direction
Remove an IP address from your blocklist
Sometimes, or perhaps even often, you need to remove an IP address from your brute-force block list in Windows Defender Firewall with Advanced Security. Removing an IP address involves the same steps as adding one; you must manipulate the array of currently blocked IP’s. And except of adding one, you remove one and putt the array back.
$ip = "233.252.0.12"
$all_ips = (Get-NetFirewallRule -DisplayName "IP Block SQL Server" | Get-NetFirewallAddressFilter).RemoteAddress
$filteredAddr = $all_ips | Where-Object{ $_ -notin $ip }
Set-NetFirewallRule -DisplayName "IP Block SQL Server" -Direction Inbound -Action Block -RemoteAddress $filteredAddr
Remove firewall rule completely
If you need to remove the firewall rule completely, use Remove-NetfirewallRule:
Remove-NetFirewallRule -DisplayName "IP Block SQL Server"Or use Disable-NetFirewallRule -DisplayName "IP Block SQL Server" to disable this rule.
One-time donation
Your donation 💸 helps support me in the ongoing costs running a blog like this one. Costs like coffee ☕, web hosting services 🖥 , article research 🔎 , and so on. Thank you 🙏 for your support❤️ https://www.paypal.com/paypalme/jreilink.
Block IP address in Windows Defender Firewall with Advanced Security (WFAS) – GUI
If you need to block IP addresses in the Windows Defender Firewall with Advanced Security (WFAS) and you don’t want to use PowerShell, you can use the Graphical User Interface or GUI. Just as easy 🙂 .
To open up the Windows Defender Firewall with Advanced Security GUI, press the Start button and type ‘app:firewall‘.
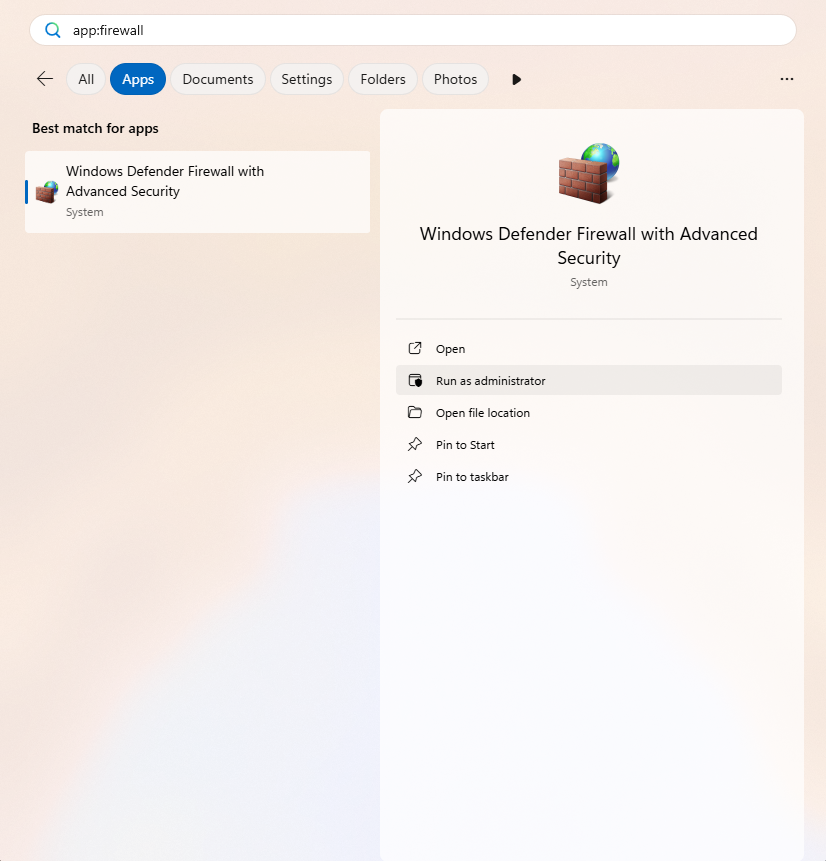
Choose Run as administrator.
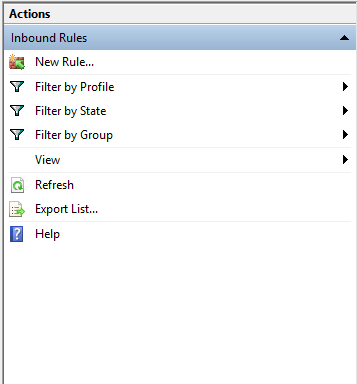
Once the Firewall app is opened, head to Inbound Rules, as we want to block an external IP address connecting to our computer (incoming traffic). Then click New Rule… in the Actions pane.
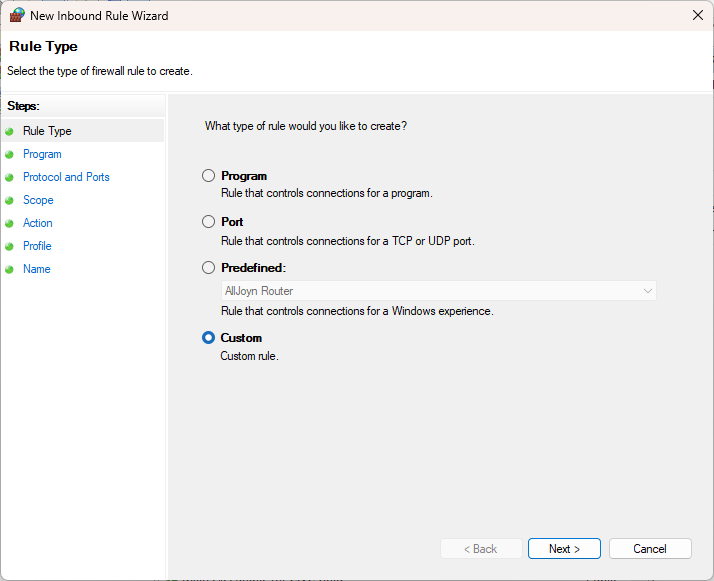
The steps and screenshots below will guide you through the process of blocking the IP address 203.0.113.15. They also briefly show you how to specify the entire range (the netblock or subnet).
In the Rule Type screen, choose Custom.
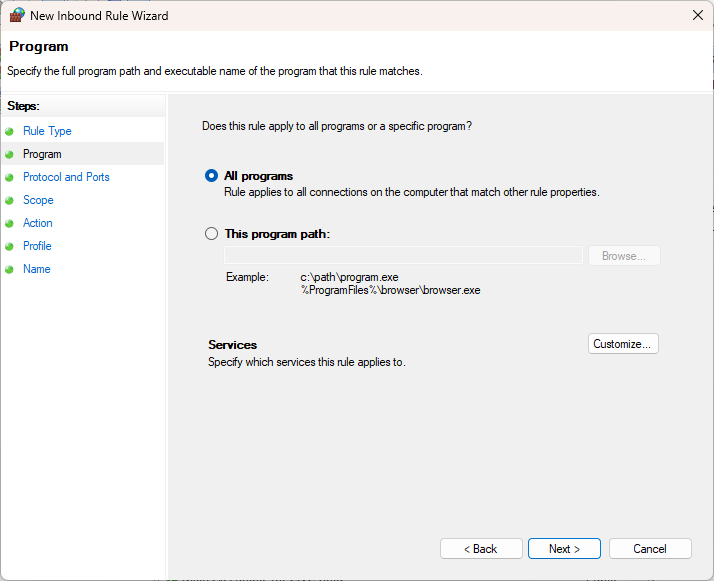
Our blockade applies to all programs, so select All programs.
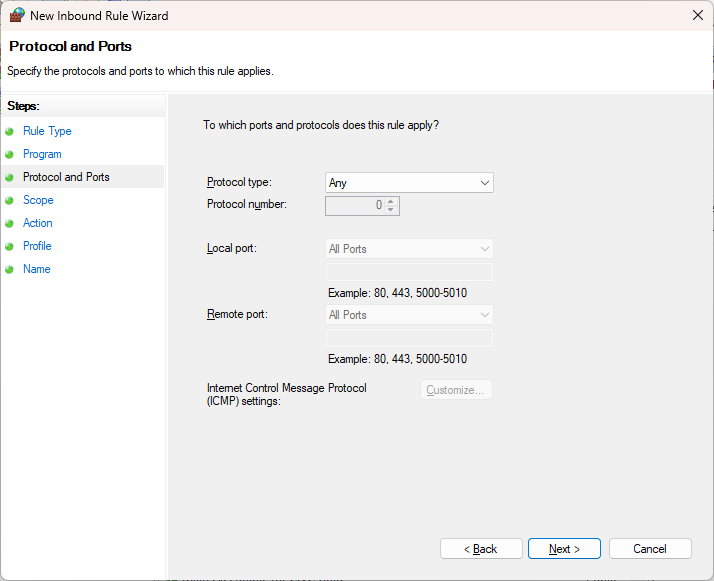
In this example, I want to block the malicious attack completely, not specifically for a port or protocol (HTTP, 80, for example). So, set this to Any:
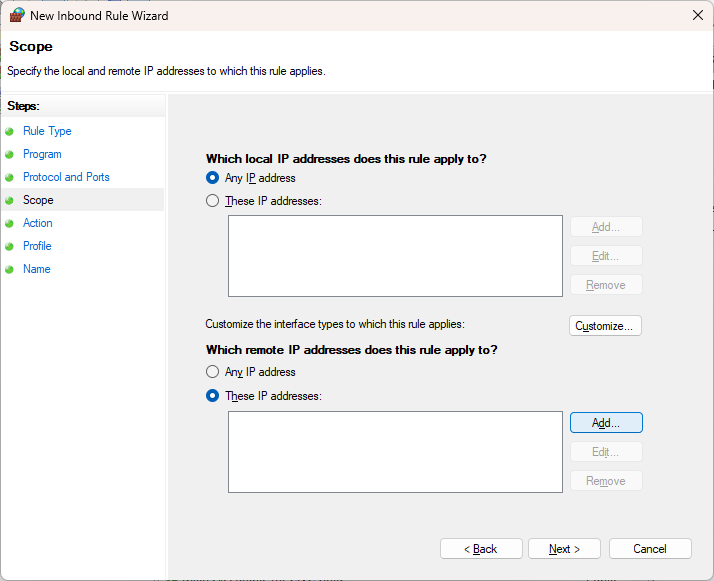
Specify that it is an external IP address and click Add…:
Fill out the abuser / attacker IP addres (203.0.113.15) and click OK.
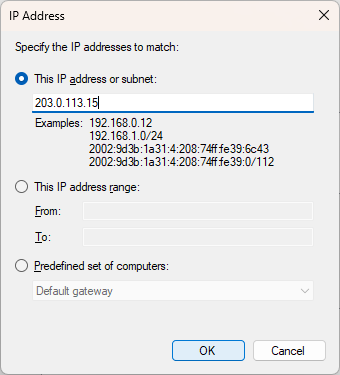
Optional: you can also specify the subnet as a range. For example, if the range needs to be smaller than /24: 203.0.113.5 through 203.0.113.105.

In the overview you will see confirmation that this IP address has been entered as Scope, and click Next.

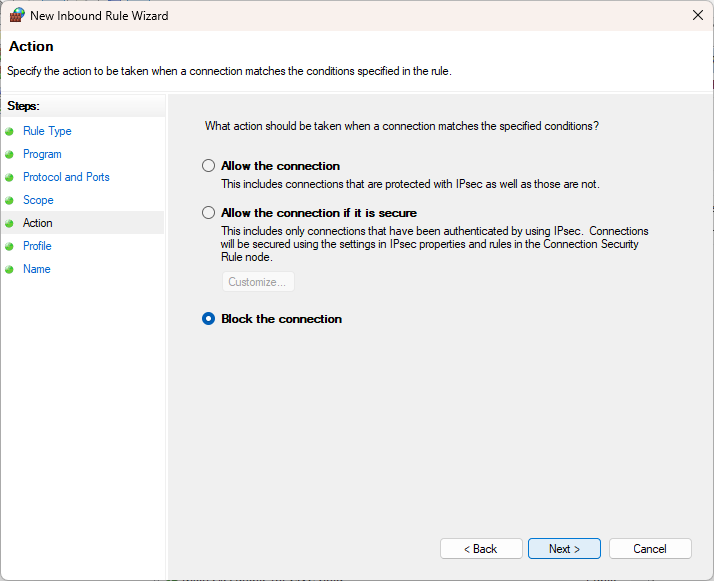
Specify that the connection should be blocked: Block the connection
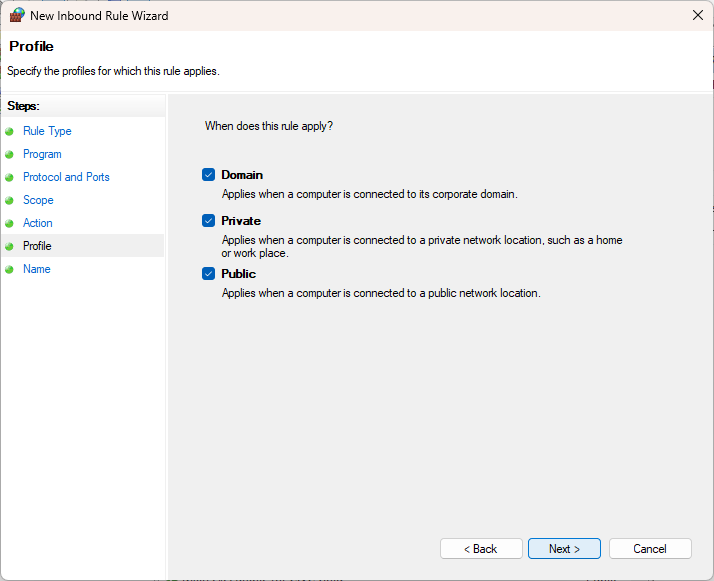
And which network it applies to
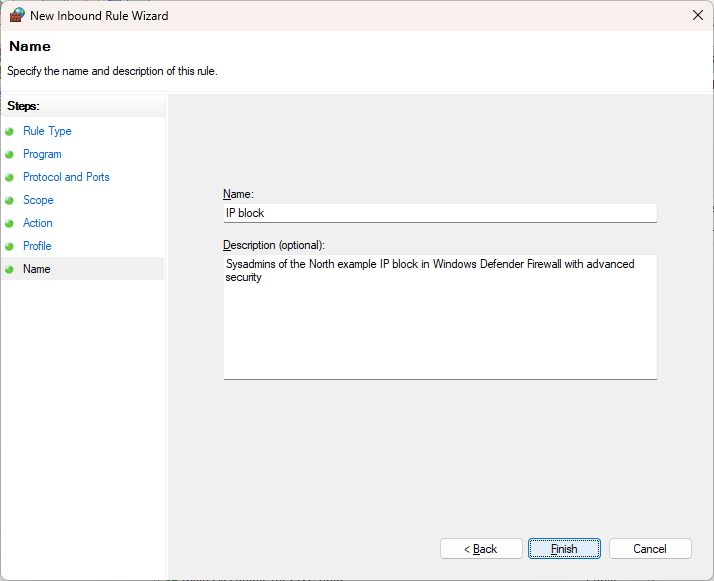
Finally, you need to give the rule a clear, recognizable name and description
Inbound or outbound network traffic
Which network traffic is considered inbound or outbound depends on your location. See the image below for more visual information.

PowerShell and CMD command-prompt
You can open the Windows Defender with Advanced Security GUI with the wf.msc command. You can also easily block IP addresses from the CMD command prompt using netsh advfirewall.
One-time donation
Your donation 💸 helps support me in the ongoing costs running a blog like this one. Costs like coffee ☕, web hosting services 🖥 , article research 🔎 , and so on. Thank you 🙏 for your support❤️ https://www.paypal.com/paypalme/jreilink.
Some quick examples to manage your Windows Defender Firewall with Advanced Security on the command-prompt using netsh (without PowerShell cmdlets).
- Use
netsh advfirewall firewall /?to get the command help information - Block IP address 203.0.113.15
netsh advfirewall firewall add rule name="IP Block" dir=in interface=any action=block remoteip=203.0.113.15- If you want to block the entire subnet 203.0.113.0/24, of which 203.0.113.15 is a part, you can enter the following:
netsh advfirewall firewall add rule name="IP Block" dir=in interface=any action=block remoteip=203.0.113.0/24- You can find the blocked rules with the show rule command of netsh advfirewall firewall:
netsh advfirewall firewall show rule "IP Block"
Rule Name:                            IP Block
----------------------------------------------------------------------
Enabled:                              Yes
Direction:                            In
Profiles:                             Domain,Private,Public
Grouping:
LocalIP:                              Any
RemoteIP:                             203.0.113.0/24
Protocol:                             Any
Edge traversal:                       No
Action: Block- And with
delete ruleyou delete all rules that match the given name:
netsh advfirewall firewall delete rule "IP block"

Deleted 1 rule(s).
Ok.
Note: the IP address subnet 203.0.113.0/24 is a reserved test block for documentation and sample purposes.
https://en.wikipedia.org/wiki/Reserved_IP_addresses
Setting up port forwarding for SSH in WSL2
This is so I have documented this somewhere. SSH into WSL2.
If you’ve set up OpenSSH in your WSL2 instance, and you want to connect to it from the outside, you need to set up a port forwarding rule in your Windows host. In my homelab I have ssh listening on port 8822, use netsh to set up the port forward.
The steps to set up the port forwarding rule and SSH access in WSL2 involve:
- Configure sshd to listen on the specific port you want (8822 in my case) and to accept incoming connections on all available IPv4 network interfaces:
- open up your
sshd_configfile:sudo vi /etc/ssh/sshd_config(or better: create an add your own config to/etc/ssh/sshd_config.d/99-custom.conf) - add or change:
- open up your
Port 8022
ListenAddress 0.0.0.0
PermitRootLogin no

PubkeyAuthentication yes

# Expect .ssh/authorized_keys2 to be disregarded by default in future.
AuthorizedKeysFile      .ssh/authorized_keys .ssh/authorized_keys2

# To disable tunneled clear text passwords, change to no here!
PasswordAuthentication no- restart sshd
- Get your WSL2 IP address, run
ip addr show eth0. The outcome is something like192.168.68.48/22. A /22 subnet means a network range capable of holding 1024 total addresses (1022 usable)… But you can use 192.168.68.48. - Configure your Windows firewall to let ssh traffic through, if this was not done automatically:
New-NetFirewallRule `
	-Name "SSH-WSL" `
	-DisplayName "SSH WSL" `
	-Direction Inbound `
	-Action Allow `
	-Protocol TCP `
	-LocalPort 8822
or use netsh:
netsh advfirewall `
	firewall `
	add rule `
	name="Open Port 8822 for WSL2" `
	dir=in `
	action=allow `
	protocol=TCP `
localport=8022- Configure the portproxy using
netsh:
netsh interface `
	portproxy `
	add v4tov4 `
	listenaddress=0.0.0.0 `
	listenport=8022 `
	connectaddress=192.168.68.48 `
	connectport=8022 `
Now you can ssh into your WSL2 instance. This configuration also makes you can authenticate using Yubikey FIDO2 authentication in SSH.
Summary
- This article explains how to bulk add, list, and remove IP addresses in Windows Firewall using PowerShell.
- The guidance includes both PowerShell cmdlets and GUI methods, accommodating different user preferences.
- Users should be cautious when creating firewall rules to avoid accidentally disrupting their internet connection.
- The article also touches on managing inbound and outbound network traffic and provides examples using the command prompt.
- Lastly, it discusses setting up port forwarding for SSH in WSL2, linking to additional resources for further learning.